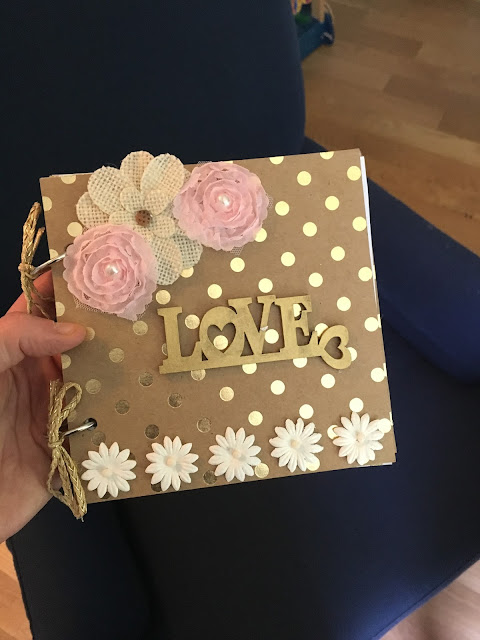
However, big events like weddings bring out my inner photo-obsessed self, and I want to print out everything. One of my oldest friends (literally of 22years) is getting married in July, and I thought no better reason to create a custom photo album for her.
What you need:
1x corrugated cardboard ring album
3x pages of hard stock scrapbooking paper
Fun floral embellishments
Gold paint and brush
Gold-wrapped twine
Pencil
Hole Puncher
Scissors
Glue Gun and glue sticks
12x 4x4 pictures
Directions:
1. Flip the scrapbook paper over and trace the outline of the square album pages. You should be able to fit 4 squares per scrapbook page.
2. Cut along the line you just drew. You should have 12 squares to work with.
3. Create the layout you want for the scrap paper, making sure to mix-up the various prints to add interest to the pages.
4. Once you have the lineup you like, flip the piece of paper over again, and line up the holes of the album. Draw a mark in the circle so you know where to make the hole punch.
5. Using the hole puncher, make holes in all 12 pieces of paper
6. Using a hot glue gun, place glue around the edges of the paper, and place on the album pages.
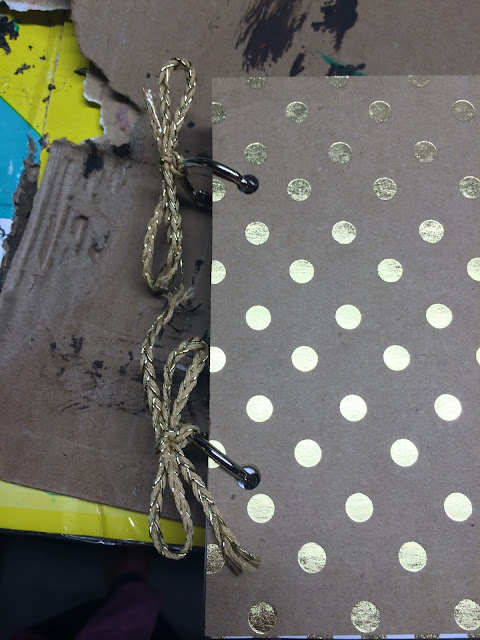
7. Once complete, you can use the silver rings (they come with the album at Michaels) to secure all of the individual squares together.
8. I then painted the "Love" sign gold to match the cover of the album.
9. I used a gold-wrapped twine to make little bows on the silver rings. Because the edges were fraying, I hot glued the end of the string to keep them intact. While the "Love" sign was drying, I hot glued the floral embellishments to the cover of the album.
10. Last step is to glue the pictures into the album. I first used a glue stick, but found that the picture looked rippled once the glue dried. I then tried using hot glue in small amounts on the corners and then lightly along the edges, and this seemed to work best.
Estimated Cost: $30
1x Album that includes the rings ($3)
3x heavy card stock scrapbook paper ($9 total)
Cover embellishments ($8)
Gold-wrapped twine ($4)
12x 4x4 pictures ($6)
Time Spent:
Because I already knew what I wanted the final album to look like, this project was pretty quick. It took about an hour and half beginning to end.


No comments:
Post a Comment